Introduction
Nothing says “autumn cozy” like a slice of apple crisp cheesecake. Imagine velvety cheesecake sitting on a buttery graham-cracker base, topped with tender cinnamon-spiced apples and a crackling oat crumble. In this article, I’ll share why this dessert hits all the right notes creamy, crunchy, tart, and sweet all in one bite. We’ll walk through choosing the best apples, mastering baking techniques (like the water bath and jiggle test), cooling strategies to prevent cracks, and smart storage tips. Ready to bake your way to flavor-filled comfort? Let’s get started!
Fall in Love with Apple Crisp Cheesecake
I’ve always loved the way a good dessert tells a story. My grandma’s kitchen used to fill with warm, cinnamon-spiced apple magic as we baked so every autumn, my goal was to recreate that cozy feeling in a dessert that could pull me back to those moments. That’s how I fell for the idea of apple crisp cheesecake a creamy, silky cheesecake base finished with sweet, tender apples and a crunchy oat topping. It’s that irresistible combo of smooth, tart, and crispy that just makes you stop and savor each bite.
Choosing the Right Ingredients & Prepping with Love

To nail the perfect texture, let everything cream cheese, sour cream, eggs come to room temperature. Using chilled ingredients not only leads to lumps but invites overmixing, and trust me, glossiness is everything in the batter.
Take a moment to breathe while your ingredients soften. I made a cheat-sheet once for my students on achieving that creaminess they thanked me endlessly when their cakes glided out of the springform pan like silk.
For a reliable crust, I often lean on a pre-baked graham-cracker base it avoids soggy edges and gives the cheesecake a solid foundation. Coat your pan well, especially if you’re using one of those old-school springforms like I did in my taco truck days, and bake that crust before layering in the filling.
Building the Layers with Care
I always start with the crust, then the cheesecake filling, followed by the apples, and end with the crisp topping. It’s like stacking memories each layer matters.
The filling: Beat your room-temp cream cheese and sugar until just smooth. Stop before it looks fluffy too much air will puff your cake, and then it collapses like my old taco truck after that kitchen fire.
Add cornstarch or flour if you want a more stable, sliceable cheesecake. Mix in sour cream and eggs one at a time, always scraping the bowl. Less air equals fewer cracks.
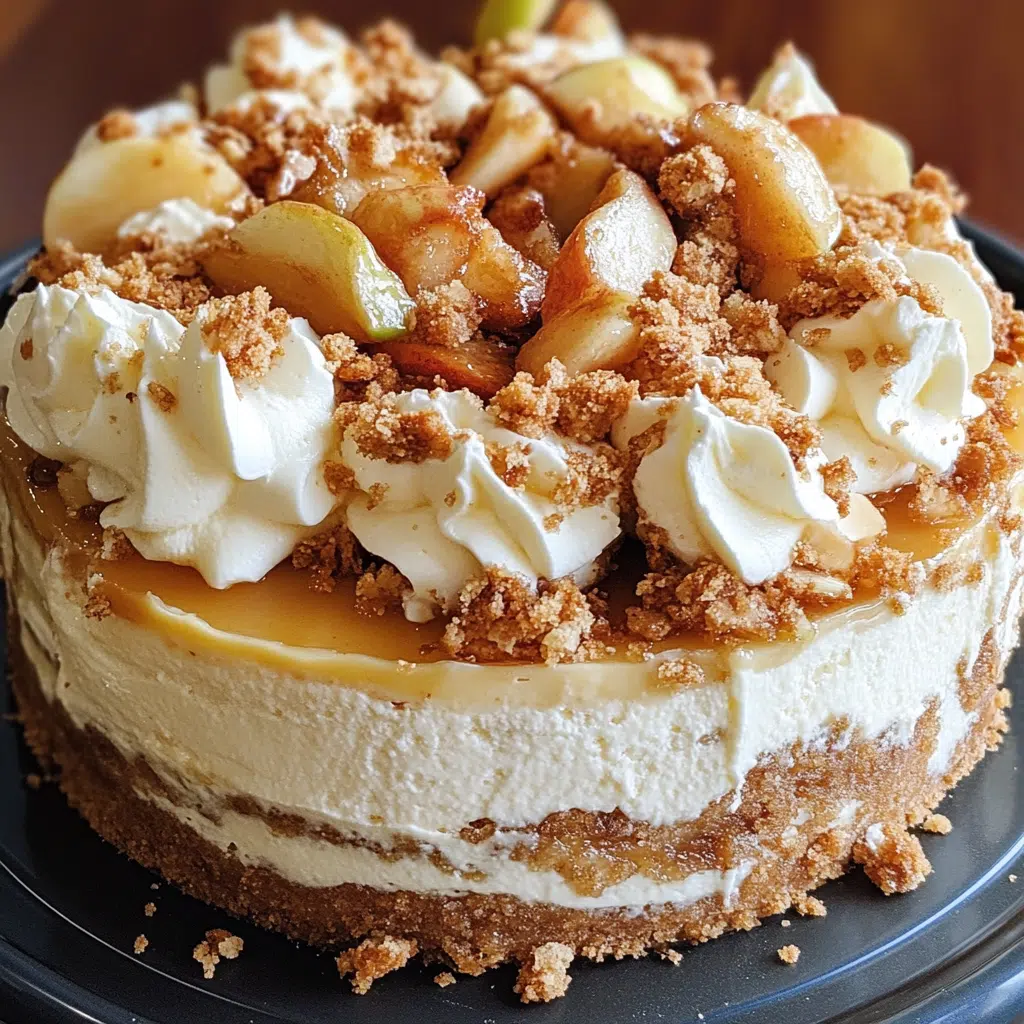
The apple layer and topping: I prefer using crisp, slightly tart apples like Granny Smith, Gala, or Honeycrisp so they stay firm and flavorful after baking. Slice thin, toss in sugar and cinnamon, and ensure excess juice doesn’t dilute your layers.
For the crisp topping, I combine oats, flour, sugar, cinnamon, and melted butter. It should feel like damp sand when squeezed no clumps that fall apart or dust that vanishes.
Bake It with Confidence Water Baths, Jiggle Tests, and Gentle Cooling

When I first started baking cheesecakes, I learned the hard way: skip the water bath, and you risk cracks that sing with regret. But once I trusted that steam-filled, gentle heat, I never looked back. Here’s how to bake your apple crisp cheesecake like a pro.
The Water Bath Your Best Defense Against Cracks
A water bath (or bain-marie) means placing the wrapped cheesecake pan in a larger roasting dish filled with boiling water; it supplies gentle, even heat and brings moisture into the oven. The result? A creamy, smooth, crack-resistant cheesecake.
Here’s how to ace it:
- Wrap your springform pan tightly with at least 3–4 layers of heavy-duty aluminum foil to stop any breeches.
- Set it in a roasting pan. Once the oven is preheated, pour boiling water around it, about ½–1 inch deep.
This gentle steam bath prevents cracks and ensures even cooking, especially important for deep cheesecakes like ours.
Knowing When It’s Done Jiggle Test & Thermometer Check
- Jiggle Test: Towards the end of baking, give the pan a gentle nudge. The edges should be set, but the center should wobble like Jell-O not wave like water.
- Temperature Check: Aim for an internal reading of around 150–155 °F (65–68 °C).
Gentle Cooling Why Patience Pays Off
- Turn off the oven, open the door slightly and let it cool inside the oven for about an hour.
- After an hour, pull it out and let it cool completely at room temperature before chilling.
- Refrigerate ideally overnight for the best texture and clean slices.
Cool, Slice, Serve and Let the Flavors Shine
After mastering the bake, the real joy comes from slicing into that glossy, crack-free surface and seeing the layered textures.
Cool with Care Preserve Your Canvas
- Remove your cheesecake from the roasting pan and let it rest at room temperature. After about an hour, place it in the fridge still in its pan and chill overnight.
- Run a thin, sharp knife around the edge before chilling to prevent the cheesecake from sticking as it cools and slightly shrinks.
Slicing Smart Clean Cuts Every Time
Step-by-Step Slice Guide:
- Trace the edge of the cheesecake with a wet, warm knife.
- Wipe your blade between each cut for clean lines.
- Lightly drizzle salted caramel or whipped cream atop each slice.
Serving Ideas & Storage Wisdom
Serving Suggestions:
- This cheesecake pairs beautifully with a scoop of vanilla bean ice cream or a dollop of whipped cream.
- Serve with spiced cider, strong black coffee, or even aged bourbon.
Storage:
- Refrigerate and enjoy within 3–5 days.
- You can freeze it (airtight wrap recommended). To serve after freezing, thaw in the fridge, then slice with a warmed knife.
Variations, Final Touches, and Personal Tips
There are so many ways to make this apple crisp cheesecake your own. Whether you prefer a rustic, farmhouse style or a polished dessert plate, here’s how to finish strong. These final touches not only personalize the dessert but elevate its appeal, flavor, and presentation.
Creative Variations to Explore
- Caramel Swirl: For a rich, buttery contrast, swirl in caramel sauce before baking. It melts into the cheesecake and pairs beautifully with the tart apples.
- Spice Infusion: Add a pinch of nutmeg, clove, or even cardamom to your apple layer or batter. These spices bring out that cozy, fall depth.
- Crust Swap: Swap the graham cracker crust for crushed gingersnaps or vanilla wafers. Gingersnaps bring a spicy kick that balances the creamy filling.
- Nut Crunch: Mix chopped pecans or walnuts into the crisp topping for a nutty bite and extra crunch.
- Boozy Apple Boost: Soak apple slices in bourbon or spiced rum before layering. The alcohol cooks off but leaves a warm depth behind.
Chef’s Final Touches & Pro Tips
- Let the cheesecake sit at room temperature for 10–15 minutes before slicing to bring out its full flavor.
- Garnish with thin apple slices, a dusting of cinnamon, or even a drizzle of extra caramel or honey.
- If freezing, wrap slices individually with parchment and plastic wrap. That way, you can thaw one piece at a time with no mess.
- Want that glossy, bakery-style top? Gently brush a bit of apricot jam over the apple topping while it’s still warm.
- For ultra-clean slices, run your knife under hot water and dry it before each cut.
This dessert has become a signature in my home and it can be in yours, too. Whether you’re making it for a holiday gathering, a family birthday, or just a quiet Sunday indulgence, apple crisp cheesecake brings warmth and flavor to any table. With the right steps and a little love, your cheesecake will turn heads and win
for more recipes follow our facebook page
Conclusion
Apple crisp cheesecake is where cozy meets creamy, tradition meets innovation. With every layer you build and each step you take, you’re not just making dessert you’re creating something memorable. Whether you’re serving this after a holiday dinner or enjoying a slice quietly with coffee on a cool morning, it has that timeless charm that everyone craves. Stick to the process, trust the bake, and most of all, enjoy the journey. After all, the best recipes are the ones that tell a story. And this one’s worth savoring again and again.
Frequently Asked Questions
What apples are best for apple crisp cheesecake?
The best apples for this cheesecake are those that balance tartness and firmness think Granny Smith, Honeycrisp, or Gala. They hold their shape during baking and offer a sweet-tart flavor that cuts through the richness of the cheesecake and complements the crisp topping beautifully.
Is a water bath necessary when baking apple crisp cheesecake?
Yes, it’s essential. A water bath creates a gentle and humid baking environment that prevents cracks and ensures an even, creamy texture. Without it, your cheesecake may bake unevenly or split down the center as it cools.
How long does apple crisp cheesecake keep, and can it be frozen?
Refrigerated, the cheesecake stays fresh for 3–5 days. For longer storage, slice and wrap pieces individually, then freeze them. Thaw overnight in the fridge before serving. While freezing works well, the oat crisp topping may lose a bit of crunch upon thawing.
How do I know when the apple crisp cheesecake is fully baked?
Use the jiggle test the edges should be firm while the center wobbles like Jell-O. A thermometer inserted just off-center should read 150–155 °F. Don’t wait until it’s fully firm or you’ll risk overbaking and a dry texture.

Apple Crisp Cheesecake That’s Creamy, Crunchy & Irresistible
A luscious apple crisp cheesecake with creamy filling, spiced apple layer, and a buttery oat crumble—perfect for fall comfort and special occasions.
- Total Time: 1 hour 35 minutes
- Yield: 12 servings 1x
Ingredients
FOR THE CRUST:
1 ½ cups graham cracker crumbs
¼ cup granulated sugar
½ cup unsalted butter, melted
FOR THE FILLING:
24 oz cream cheese, softened
¾ cup granulated sugar
1 tsp vanilla extract
¼ cup sour cream, room temp
3 large eggs, room temp
1 tbsp cornstarch or flour (optional)
FOR THE APPLE LAYER:
3 cups thinly sliced Granny Smith or Honeycrisp apples
¼ cup light brown sugar
1 tsp cinnamon
FOR THE CRISP TOPPING:
½ cup rolled oats
⅓ cup flour
⅓ cup light brown sugar
½ tsp cinnamon
¼ cup unsalted butter, melted
Instructions
1. Preheat oven to 325°F. Wrap a 9-inch springform pan with foil.
2. Combine crust ingredients, press into pan, and pre-bake for 10 minutes.
3. Beat cream cheese and sugar until smooth. Add vanilla, sour cream, eggs, and cornstarch. Mix gently.
4. Toss sliced apples with sugar and cinnamon. Set aside.
5. Pour cheesecake filling into crust. Layer apples evenly over top.
6. Mix topping ingredients until crumbly. Sprinkle over apples.
7. Place pan in water bath and bake 60–70 minutes until edges are set but center jiggles.
8. Cool in oven for 1 hour, then at room temperature, then chill overnight.
9. Serve slices with whipped cream, caramel, or cinnamon garnish.
Notes
Use room temperature ingredients to ensure a smooth filling.
Freeze individual slices wrapped in parchment and plastic for easy serving later.
Let rest 10–15 minutes before slicing to enhance flavor.
- Prep Time: 25 minutes
- Cook Time: 1 hour 10 minutes
- Category: Dessert
- Method: Baking
- Cuisine: American
- Diet: Vegetarian
Nutrition
- Serving Size: 1 slice
- Calories: 420
- Sugar: 28g
- Sodium: 260mg
- Fat: 28g
- Saturated Fat: 16g
- Unsaturated Fat: 10g
- Trans Fat: 0g
- Carbohydrates: 36g
- Fiber: 2g
- Protein: 6g
- Cholesterol: 105mg